MEOW! My favorite eyeliners for a Cat Eye

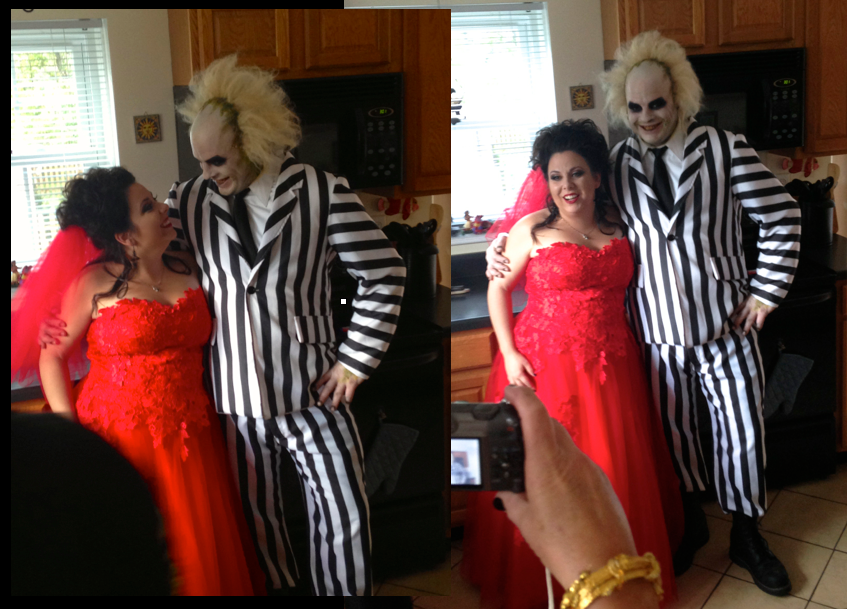
I’ll admit it, I can be fickle when it comes to eyeliners. I am always on the lookout for the best - liquid, cream, space-age material, whatever! But if you’re going for a cat-eye or even just a sleek, lash-defining line, it’s got to go on perfectly.  

theproductpro.wordpress.comOh, and also stay there once it’s on.

Here are my favorites of this moment for staying power, quality of color and usability:


They’re Real! Push-Up Liner: $24

PRO’s:

-This soft and flexible rubbery tip makes a precise line (thick or thin!) with a bevel at the end… purrfect for a cat-eye.

-This liner goes NO. WHERE. once it’s on. Ever feel like spontaneously running through a sprinkler or hanging by the pool in your perfectly placed cat-eye liner? This one is for you.

CONS:

-Once it sets, this creamy, stay-put formula doesn’t have the most color saturation I’ve seen. It would be A+ in a very very dark blackest Black kind of shade.

-Once the product has lived in your makeup bag for a while, it can dry out.


eyeliners! theproductpro.wordpress.comELF Essential Expert Liquid Liner: $1

PRO’s:

-Super budget-friendly buy (no... you didn't hallucinate. This is $1)

-It’s staying power outweighs many more expensive versions

-The applicator brush is user-friendly for most 'A-typer's' (not too too long or floppy), but take your time to prevent wayward brush action.

CONS: It dries very quickly, so fix any botched spots ASAP or you’re stuck with a look you likely weren’t going for. :/.

-If you're used to a foam applicator or a shorter brush, this may not be a good fit.


NYX The Curve Liner: $15

PRO’s:

-The handle’s ergonomic design (hence the name) makes this liner easy to hold and guide while applying. The shape also makes for an easy application on someone else, if you happen to be helping a friend. **

- This formula is less wet going on than the ELF, but delivers almost the same depth of black. LOVE the saturation.

-The foam tip seems to hold the right amount of product, perfect for a thick OR skinny line.

CON:

-Well, I can't think of one. There it is.

MAC Fluidline $16.50

PRO’s:

-Is it a gel? Is it a cream? NO! It's Fluidline!! This awesome foolproof, waterproof winner is SUPER easy to use if you're comfortable with using a brush.

-Doesn't flake, crumble, or smudge. If it HAS to be perfect, this is your liner.

CON:

-You must be comfy with using a brush. Sometimes (especially if you get stuck doing your makeup in rush hour on the grid-locked Eisenhower like I do sometimes...) you just need convenience, too. A brush might be a home- application-only thing. In case you are in the market, however, This is the brush I suggest and personally use. (welcome to your next fave brush if you've never tried!)


I don't always review makeup... but eyeliner advice may prevent others from showing up late to dinners, events, and dates. It's almost a public service, right?? Until next time, stay fabulous, my friends!

**Product Credit: They're Real and The Curve were both donated by my best friend Kel, so I could experiment and yes: help the greater good (Those who need eyeliner reviews). Thanks, Kelly! xoxox

Mad About Mac Retro Matte

I've been rocking a couple of Mac Retro Matte Lip Colors lately. It occurred to me that I haven't accepted so many compliments or 'where-did-you-get-that?'s on my lip color in... I don't know, a long time. This collection is not that new (Sept 13, I believe) but I'm having some fun and thought I'd share! After much positive reinforcement on the color, along with a slow and passive realization that it does not smudge off during the day, I had to go grab some additional 'flavors'

wpid-testUpload.png 
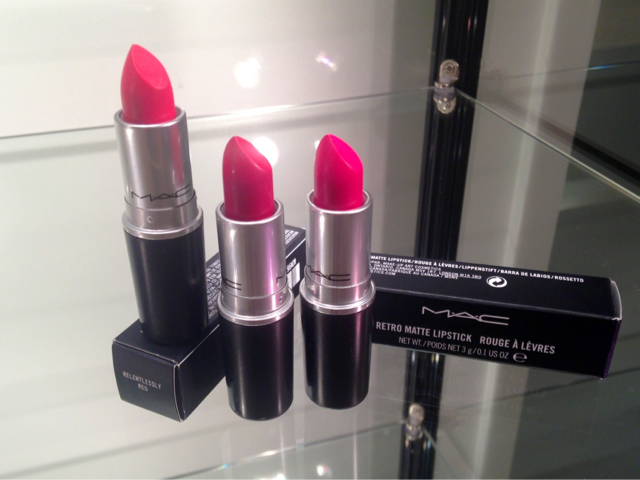
Here's what I grabbed: Retro Matte Colors (From Left) Relentlessly Red Ruby Woo All Fired Up Not pictured: Flat Out Fabulous

"All Fired Up" is my total fave... but Ruby Woo is the original crowd pleaser of this collection, known for it's Vampy Hollywood True red with its (visually teeth-whitening) flattering blue undertones.

wpid-testUpload.png

I was told by a Mac Pro that the Retro matte collection features some of the usual, pre-existing Mac Mattes, now made with the same formula that made Ruby Woo popular back in like,1999 or so. Legend has it that these bad boys are made with kaolin clay, which undoubtedly provide its lasting, mattefying effect. My fave features here are how light it feels, it's very vibrant colors, and it's lasting effect without drying you out (like a stain)*

*That last part seems to vary slightly between formulas... Ruby Woo and All Fired Up seem the creamiest to me... While Flat Out Fabulous (Fuschia) and Fixed on Drama (wine) seem to go on drier. For official info on the collection: http://www.maccosmetics.com/whats_new/11605/New-Collections/Retro-Matte/index.tmpl

and until next time- Stay Fabulous My Friends!

Better Than Easter Candy

wpid-testUpload.png 
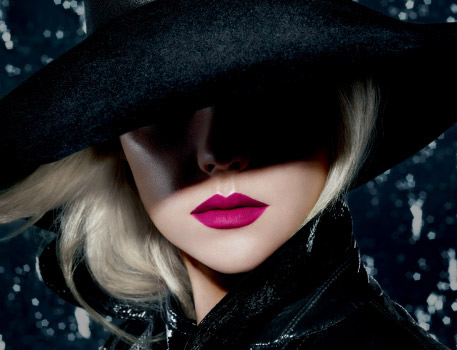
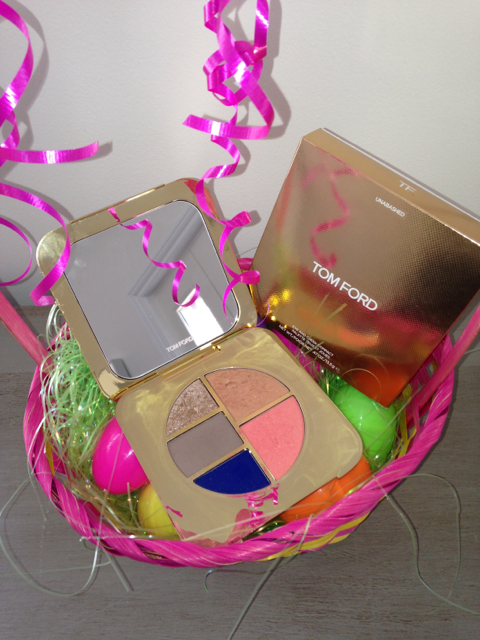
Check out my new Limited Edition Eye and Cheek compact from the Neiman Marcus Tom Ford on Michigan Avenue. My girls Magdalena and Dominique set me up with this beauty, perfect for spring!
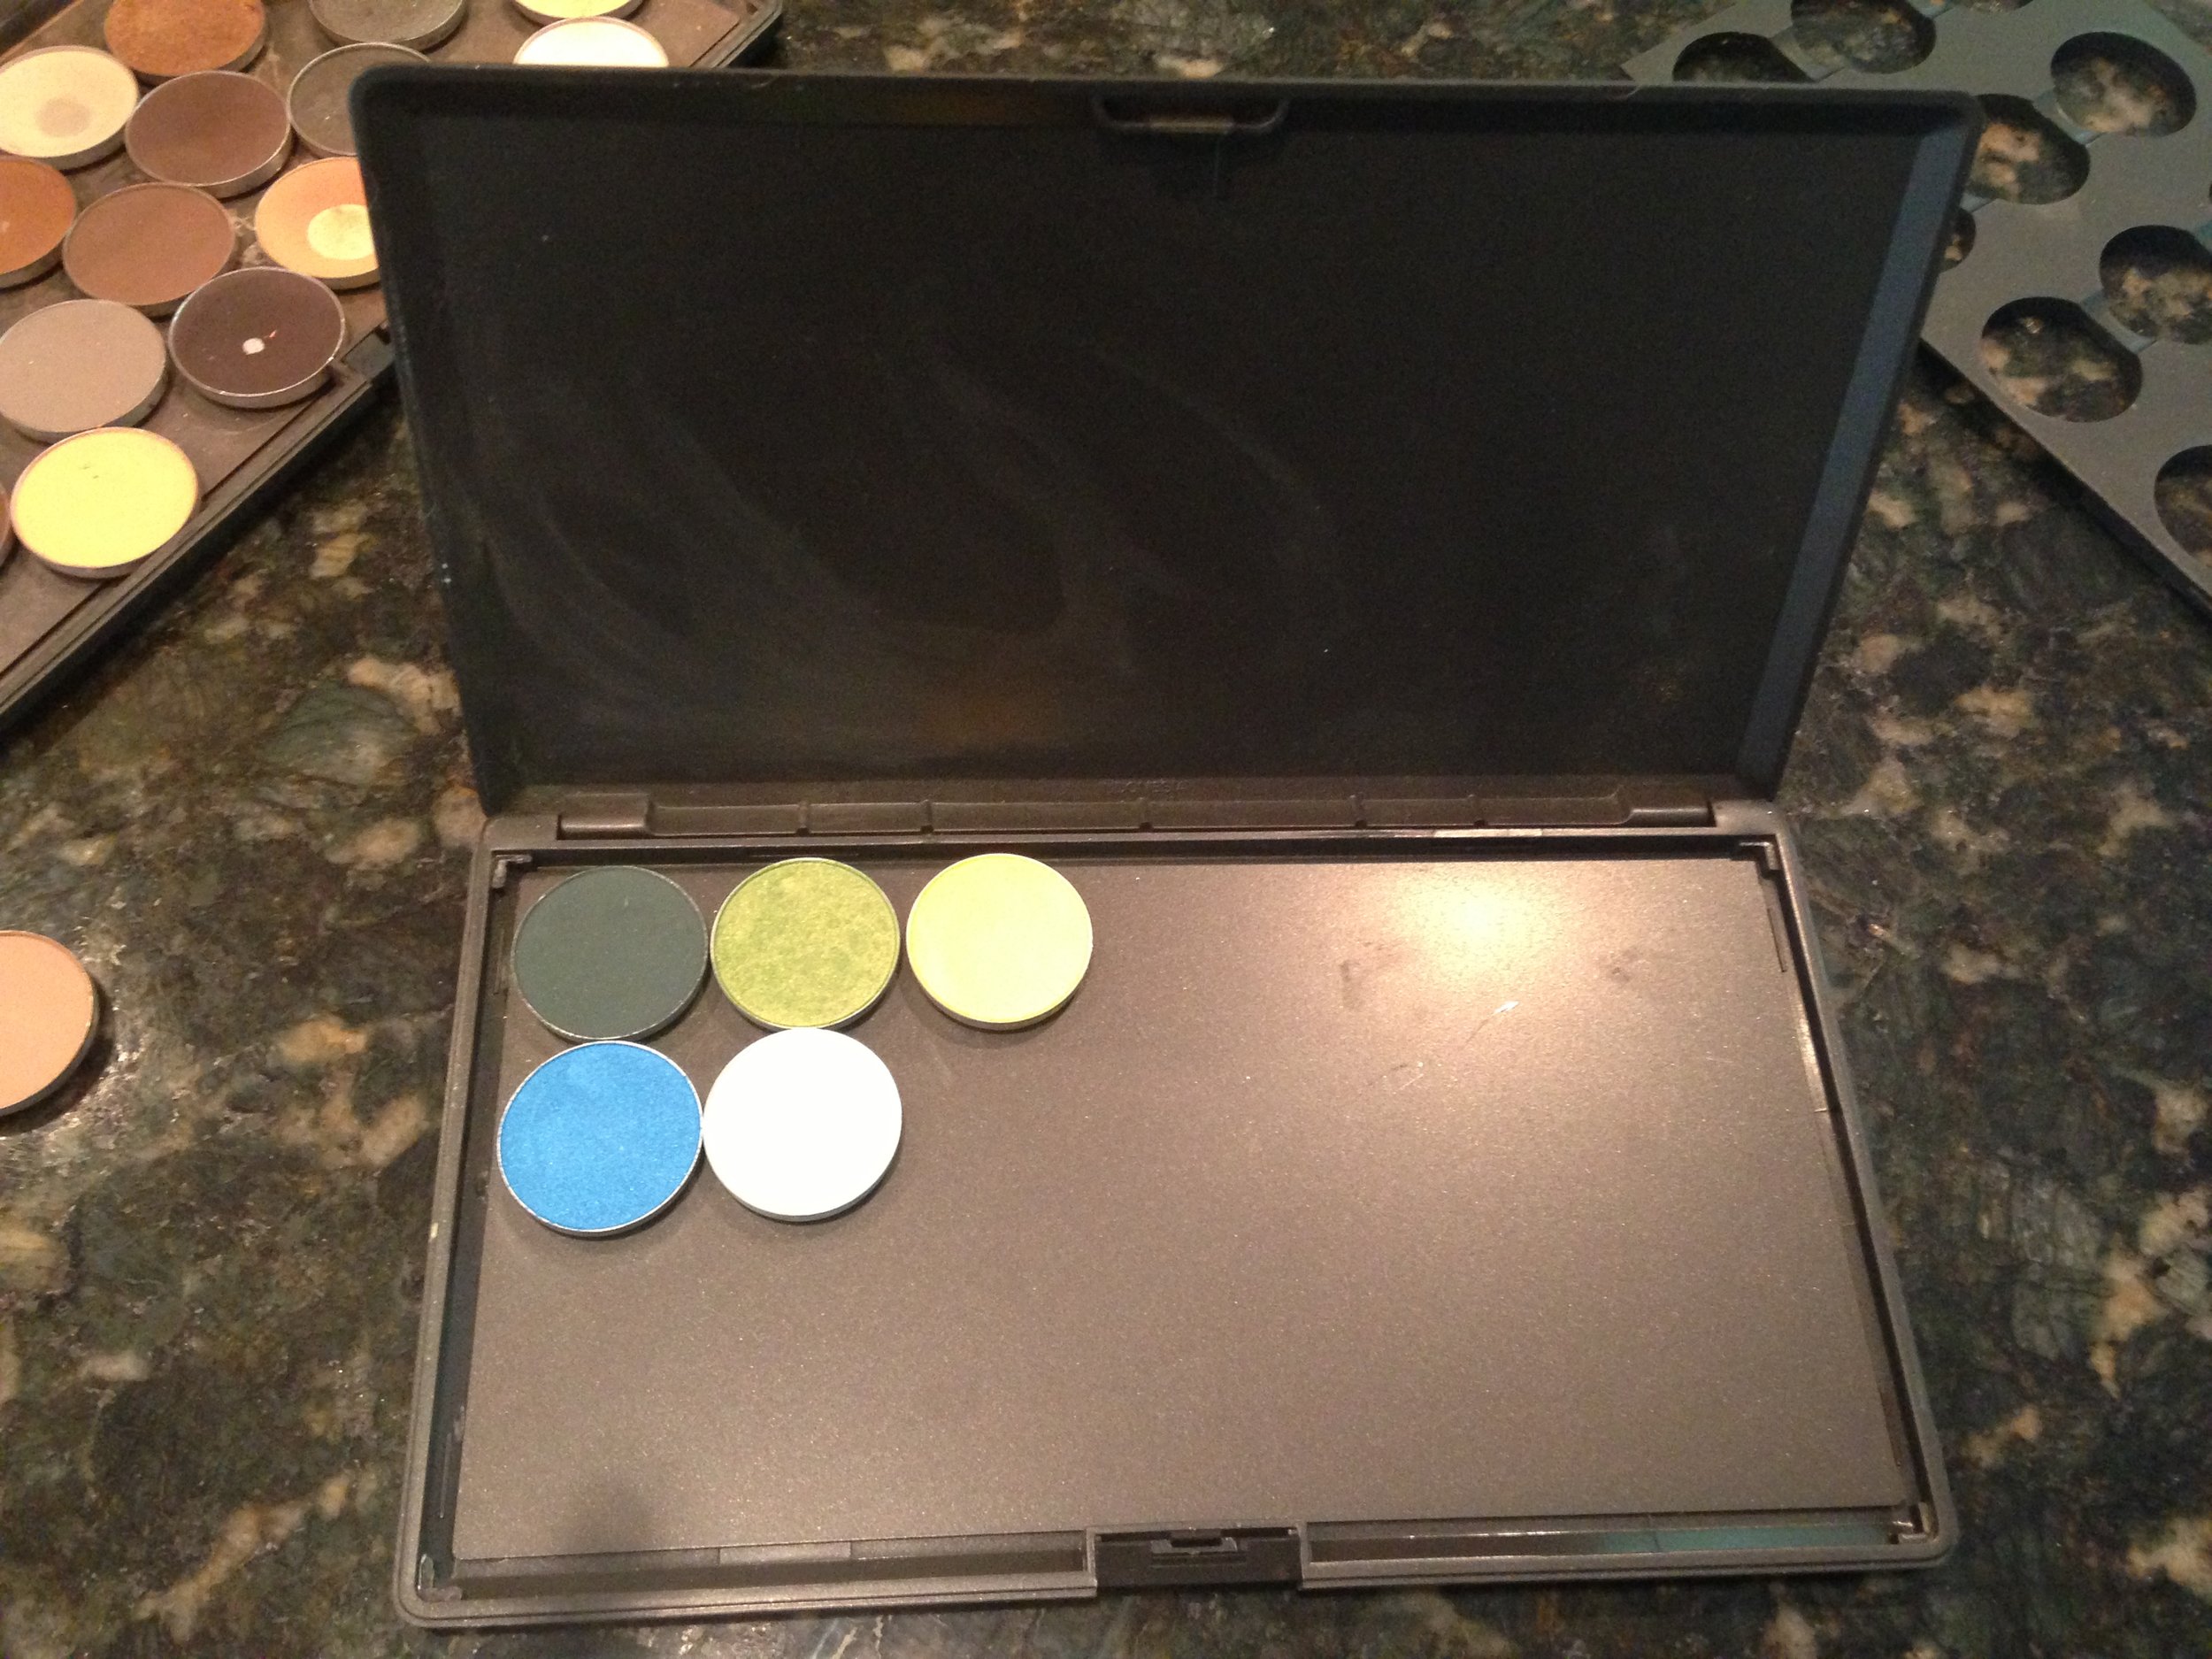
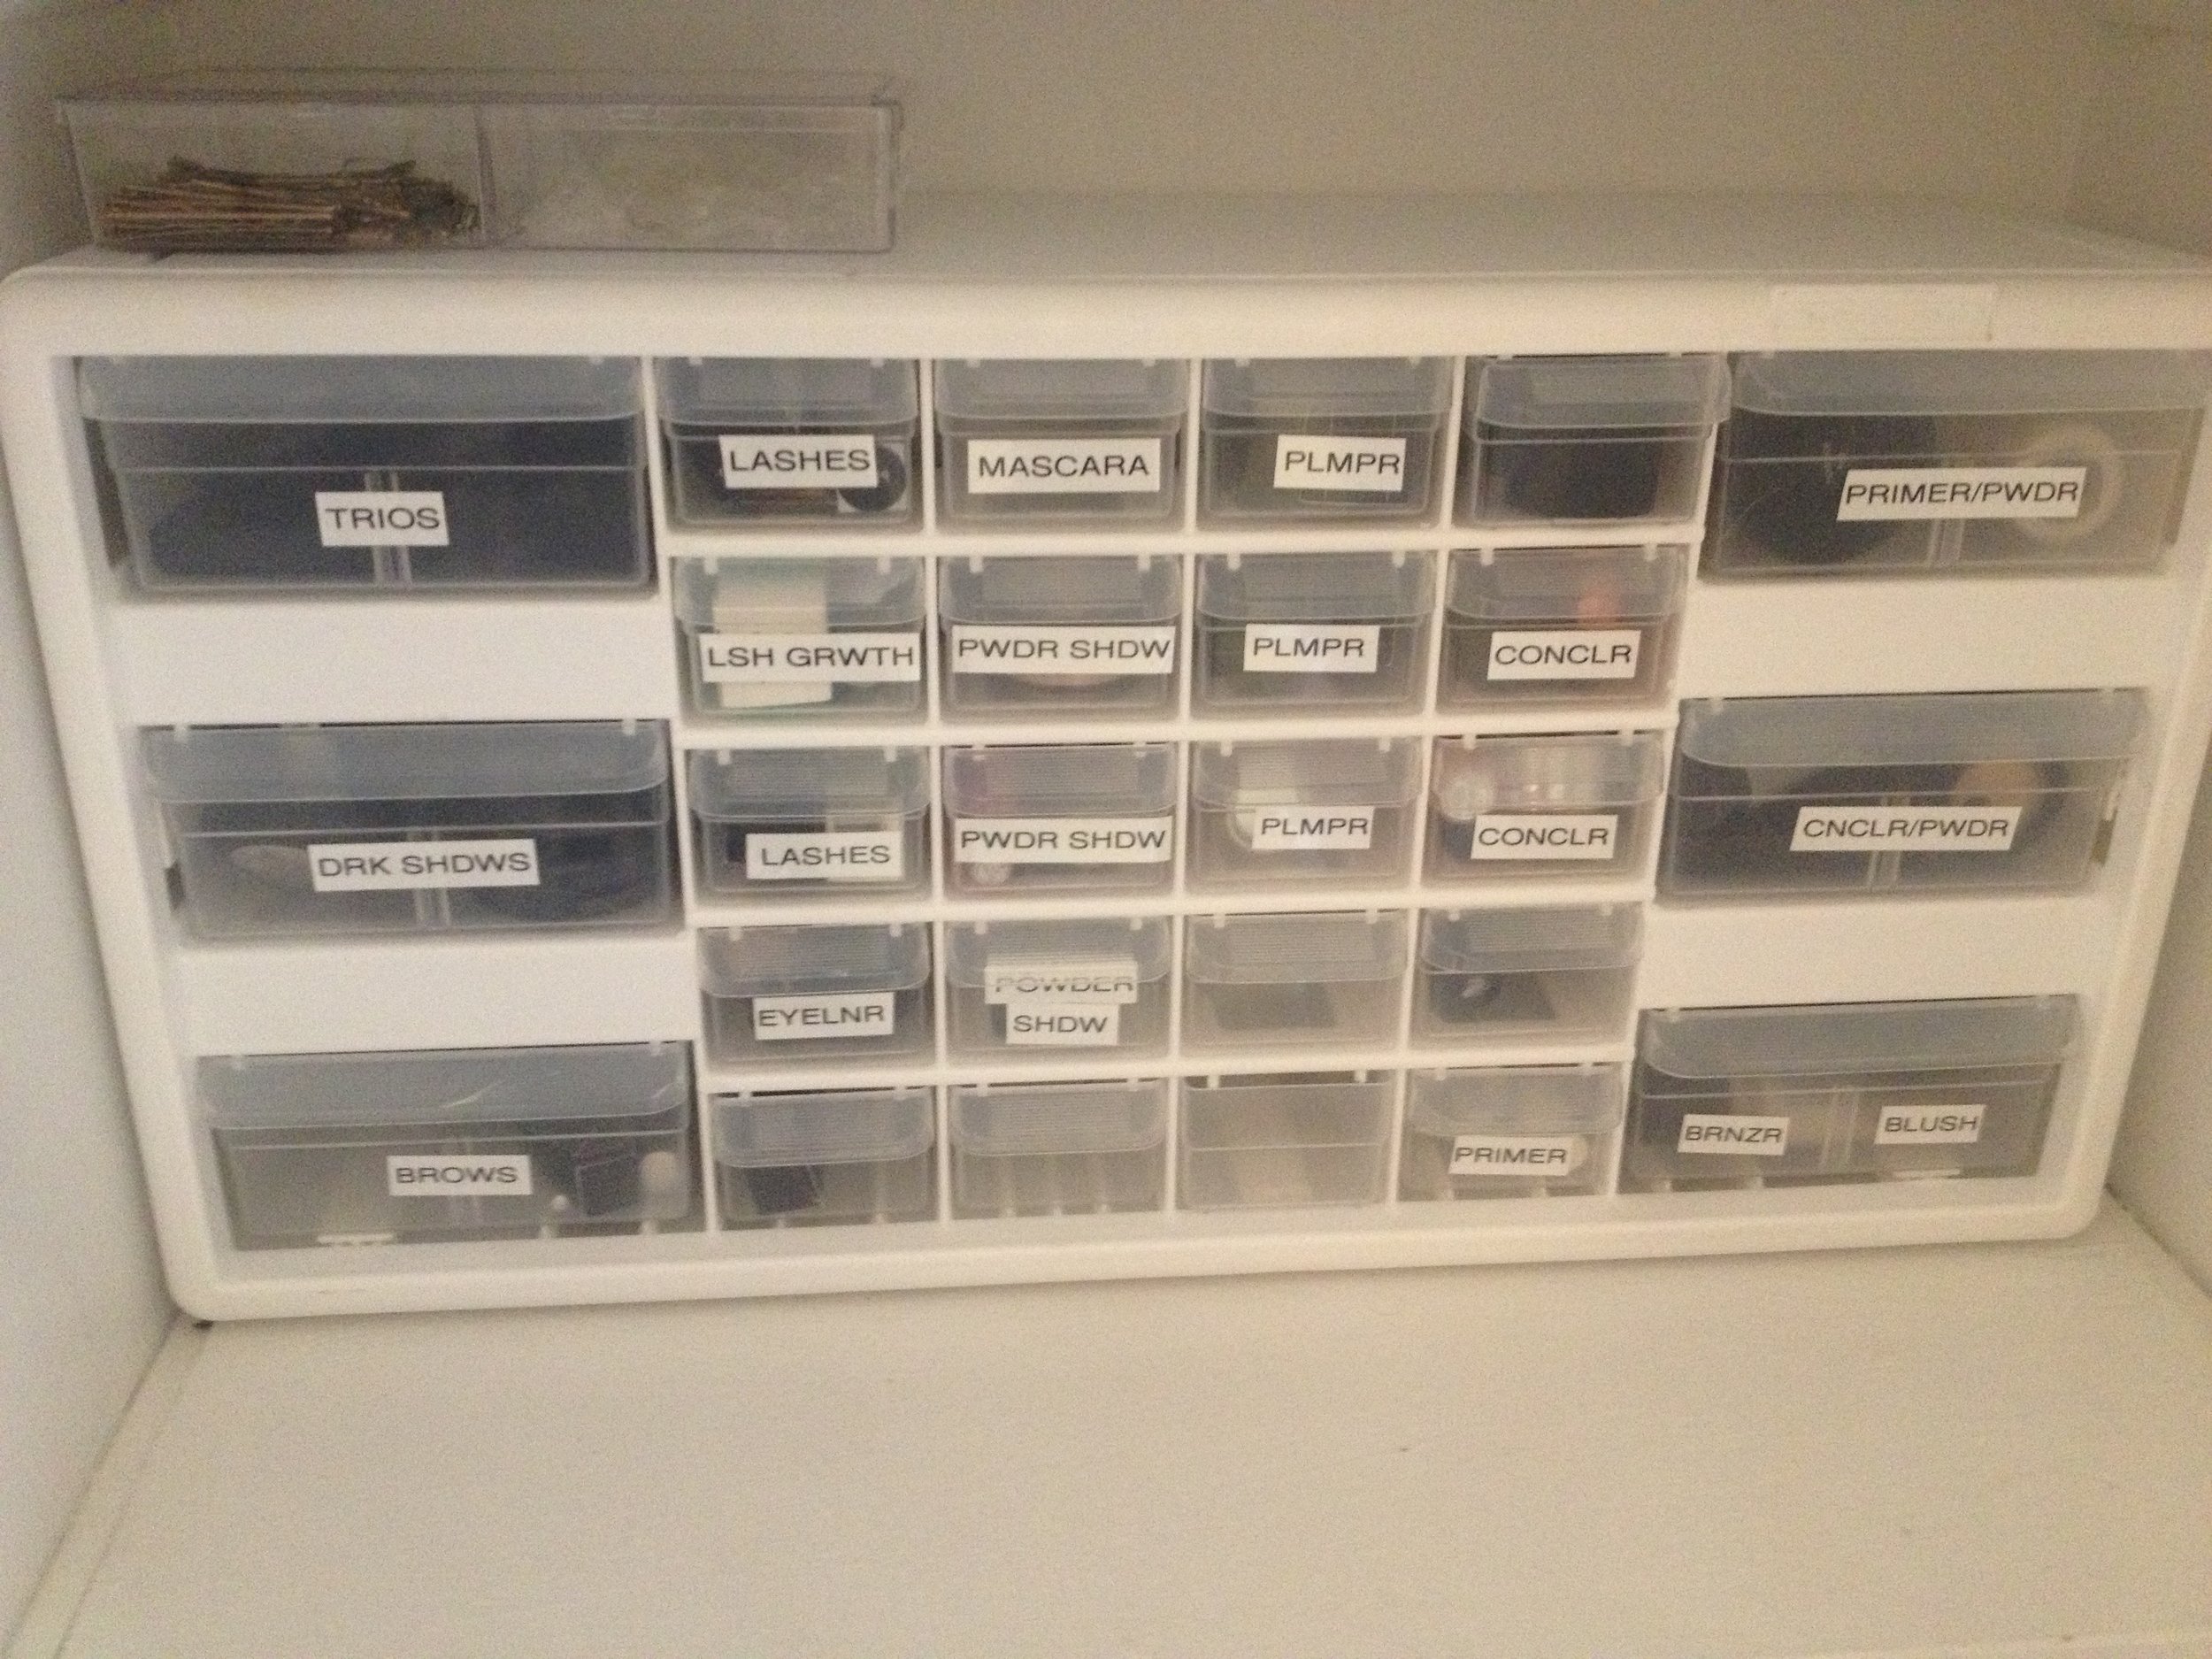
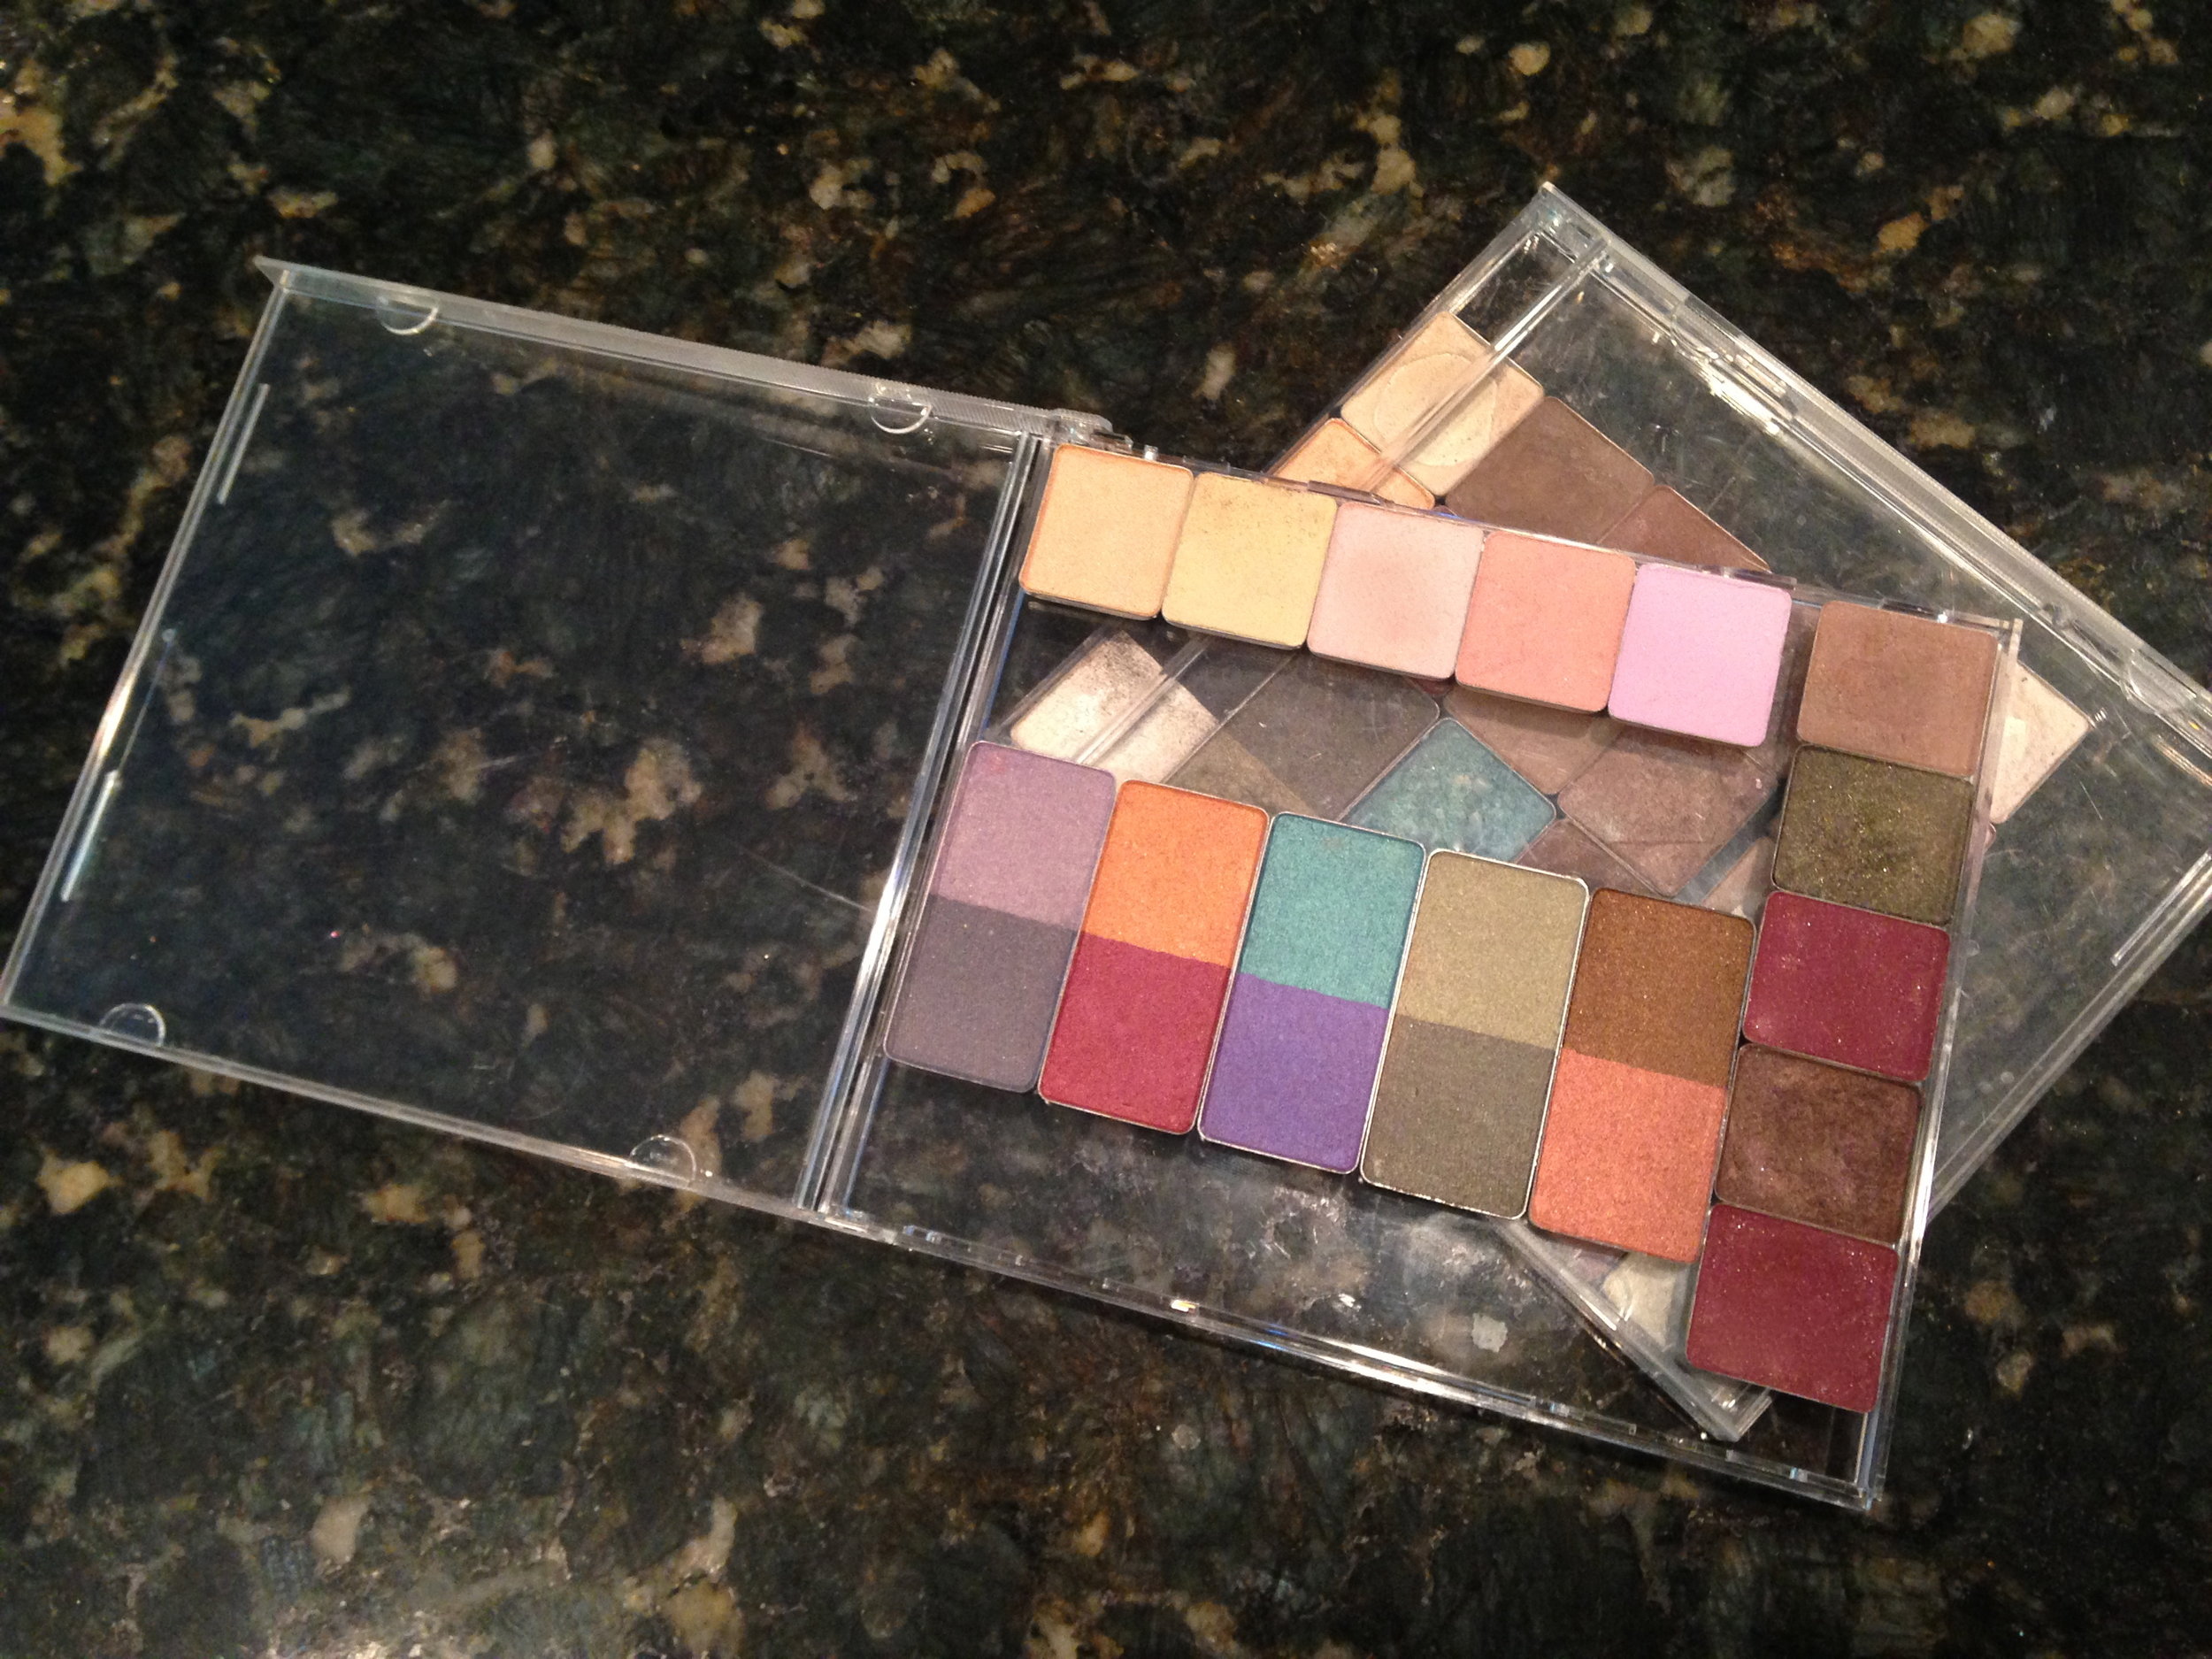
 Called 'Unabashed', this gold and white lacquer compact ($95) is just the thing any girl would want in her Easter basket.

Featuring a very easy to use, buildable neutral taupe, a navy powder liner, and a subtle shimmer highlight, this compact makes it easy to bring some springtime colors with you on the go. Be warned, however: if you ever apply your make up quickly, or in the car while sitting in traffic (like I do sometimes), you'll want to make sure you aren't touching your blush brush into your navy liner. Unless you happen to like the Navy as a cheek color, I'm not here to judge. =)

You'll love the blush, a nice flattering shade for just about anyone. It almost reminds me of Nars "Orgasm" but happens to come with an awesome highlight, great for sculpting out a contour.

Try this look with Tom Ford's ultra shine lipgloss ($45) "Tawny Pink" (a milky, slick light pink) for a look perfect for Easter!

If you're in Chicago, give these girls a call:312-642-5900 to try on some awesome new colors- they are amazing!

Until next time, stay fabulous my friends!

Intellishade: Major Multitasker

So, I'm actually a little embarrassed that I have not yet written about some of my favorite product lines in this: the 'Product Pro' blog...Yeeesh. In this category of neglected-yet-amazing products: one of my favorite sunscreens, Revision Skincare's SPF/AntiAging Treatment/Moisturizer multitasker all in one, Intellishade SPF 45.

wpid-testUpload.png

Kudos to Revision Skincare for coming out with a sunscreen that is actually enjoyable to wear. It's not new, Intellishade has been one of Revision's bestsellers for years. (Hence my embarrassment for not profiling this NewBeauty Best of Beauty Award winner sooner)

This tinted moisturizer is a broad spectrum SPF 45, featuring the ever-important octinoxate and zinc oxide, making this a great broad spectrum SPF for even the most sensitive types. The sheer-ish tint is just enough color to take the dreaded SPF-whiteness out of the equation, while neutralizing redness and minor imperfections. It almost magically matches most skin types, hence it's intelligence, I suppose.

Loaded with 3 awesome peptides, antioxidants, humectants, coenzyme Q10 and a glorious dewey finish, this product is an obsession for our patients who have either mature, normal, or dry skin.

***By the way: If this all sounds up your alley, but you desire more of a matte/clean finish, Revision also offers Intellishade SPF 45 Matte. Historically the Matte has been a about half as popular (in my experiences), but I've always been glad to have it, especially for those clients who have oily skin.

Give this a mad multitasker a try if you're in the mood for an awesome, hydrating, and dewey-looking all-in-one AM product.

And in the meantime, stay fabulous my friends!

Good Buys for the Beauty on a Budget: Coal Liner is Better than Coal

As a Beauty on a Budget myself, I know the value of a good Beauty Buy. When shopping at the Target in North Scottsdale, my mom and I noticed a number of cutie-pie ELF gift sets. WAIT: Are you kinda wondering why ELF made my blog post, AGAIN? Because there are plenty of Just-Okay-Grocery-Store-Cosmetics out there, but they all cost a heck of a lot more. In fact, if I am buying a lip gloss from a display at Walgreens (without being able to see it outside of the package via a tester, or hear a firsthand description of the product from an attentive sales person) I feel like it needs to cost like, I dunno, $5 or less? Am I the only one who feels this way? I have seen OTC products and grocery store cosmetics exceed $39 (and higher!). Come on, guys. We are buying this item from a shelf-talker in a neon-lit convenience store. Make the price convenient, too! ELF cosmetics offer some pretty-okay cosmetic products at the price-point I feel they SHOULD be offered for. So that's why ELF, in case you were wondering. Sorry, I digress....

Okay, here are the two winners (In my opinion) that are especially good values in the ELF Holiday Department:

IMG_3004

Full Disclosure: At the time I am writing this, I haven't tried the Brightening Eyeliner Pencil OR the Shimmer Eyeliner. But I HAVE tried the waterproof eyeliner pen and it's actually pretty good! $3 good? Sure! So I figured the other two items are simply a bonus and hey, they could be good!IMG_3002Here's another good one, $3 for 3 pairs of lashes. I haven't tried the glue, so I can't speak for it yet, but I figured this: Ardell (our usual drug-store-Go-To lashes) are getting up there in price these days! For $1 a set, I figured we can't lose here... so once again, the extra item here is kind of a bonus. And at the VERY least, these cutie little kits make great stocking stuffers. So, if you're plum out of ideas (especially if you happen to be a Beauty on a Budget) I think ELF gift sets could be a good risk! (Coal eyeliner= better than coal!) =)

Fun Find: Every Drop Beauty Spatula

Have you ever resented the fact that you can't reach the bottom of the bottle to get the last drop of really-great-and/or-expensive-fill-in-the-blank product to get the last bit? I have heard anecdotes over the years of women prying open a container of TNS Recovery Complex (and many others) with a pair of pliers. This is probably hazardous... (at the very least you at risk breaking a nail) and is likely not the experience you desire when using a fabulous, cosmetically elegant, and likely expensive-as-heck product. Don't be angry at the bottle. It IS just a bottle, after all.  Just get this "Every Drop" Beauty Spatula!

 Don't get angry, get Spatula!

Don't get angry, get Spatula!

I came across this miniature silicone spatula with when I opened my new 'the Container Store' Stocking-Stuffer catalog that came in the mail today. Genius!

The unique shape is designed to reach under the lip of a jar to get every last drop.  It's washable (reusable) and has a long handle to reach into really skinny/tall bottles or jars. The cherry on top: It's only $4.99, and is made in the USA. And really, what else do you possibly want from a spatula?!

Happy Shopping! Stay Fabulous, My Friends!

Beetlejuice, Beetlejuice, Beetlejuice! (Makeup)

I had the pleasure of doing makeup for a Halloween-themed wedding recently. The Bride and Groom (Laura and Jay) wanted to be Lydia and Beetlejuice, which was a fun challenge for me to plan out. With Halloween only a couple days away, I thought it would be fun to share some of the pictures of the Bride and Groom. The cutie-pie couple was thrilled, and tells me they had lasting makeup and an AMAZING time!

It was fun creating the hair with Liquid Latex and Crepe Hair, which I steamed straight... no wigs were used in the making of Beetlejuice!

Lydia decided that GOTH was a no-go for her bridal look (and I don't blame her!) so we tied in her GLAM look with a Temptu S/B foundation that was about half a shade lighter than reality, and some MAC 'Orange' and 'Signed, Sealed' colors. She's got Mac Cosmetics Russian Red on her lips for a classic vamp look.

Enjoy!

Uhhh... sir? You have something in your hair.... Screen Shot 2013-10-30 at 11.03.41 AM Screen Shot 2013-10-30 at 10.58.44 AM Lydia Goes Glam, which is much better than Goth when you're the Bride Yes, the shadow coordinates with the bouquet.... You are right to be impressed. Lydia and Beetlejuice Lydia and Beetlejuice (Laura and Jay): The Happy Couple!

MAC recycles and you get FREE lipstick: Win/Win

Ok, I know for those of you in-the-know, this is super basic info... But I just HAD to put it out there for those who may not know. It's not fair to keep things like this to yourself (shame on us!!), and I don't know that I've EVER seen it advertised, have you?? Did you know that MAC will take your empty makeup products and recycle them? (They call it the Back to MAC program) A sales associate in the store told me that they make playground equipment with it. Fascinating! And even I, theproductpro, didn't know about this for a number of years. waaaaaah?

As an incentive: for every 6 pieces makeup packaging that you recycle, MAC will let you pick a lipstick (or eyeshadow, depending on whether you do this at a store location vs online) of your choice FOR FREE*!

*The exception is the VIVA GLAM line, (All proceeds from VIVA GLAM sales go toward helping women, men and children living with/affected by HIV and AIDS).

The most helpful thing about this in my opinion: 

If you have OLD products (yes, its time to let them go) or colors that you just aren't nuts about: recycle those bad boys and breathe some new life into your collection with FREE PRODUCT! Yeah!!

On the website, MAC's own 'Primary Packaging' is accepted, including:

Empty Compacts

Tubes (lipglass, lipstick, liquid liner, paint tubes, etc.)

Empty mascaras

Empty foundation tubes, bottles, and jars

Here's my recycle haulHOWEVER, the girls at the location near me say this (and you didn't hear it from me!): You can bring in anything that involves plastic.

They tell me that this INCLUDES the empty makeup remover wipes package AND empty Lash containers.

My response to this was: "Do you have any idea how many of these I have thrown out over the years??" waaaaaahhh!

...So if you weren't before, now you too are empowered with this knowledge. Enjoy that. And your free lipstick!

Until next time, Stay Fabulous My friends!

Tutorial: Let your eye-shadows run free!!!! ...in 7 Easy Steps

Why would you want to de-pot your eyeshadows (and blush/bronzer etc) from the packaging, you ask? Why WOULDN'T you?: This way you can put them all in one place, and make your life much easier! ...Well, at least where makeup is involved... Many products are offered in "pro" pans, without the packaging... but many are not. This is especially true in the case of limited edition products, or items from another brand that you'd like to combine with your pro pans in a palette.

Here is a step-by-step tutorial of how I de-potted my MAC products:

You'll need: Parchment Paper, a flat iron, a pointy knife or screwdriver, an exact-o knife, rubbing alcohol, and craft magnets with an adhesive backing

Step One: I used a cheap IKEA knife to CAREFULLY pop the pan out of the packaging. The seam is hard to see at first. Be careful not to accidentally throw your shadow across the room!

EEEEK: don't shoot your eye out, kid!

Here's what the pieces look like separated:

Step 2: Place the parchment paper over the flat iron (or other comparable heat source) Mine was set on 145 degrees, which is about MEDIUM. Place the pieces onto the paper so the heat can start to soften the glue (as pictured here)

IMG_1359

Too Hot to Hold: be careful, now!

Step 3: After about a minute or so, remove the lower packaging from the heat. The label's adhesive will now be soft, so you can easily remove it. Set it aside.

Step 3

Yes, I label EVERYTHING

Step 4: After about another minute or two, you can carefully remove the shadow pan from the heat. Very CAREFULLY wiggle your x-acto blade between the pan and the plastic. The glue should be soft, and the pan should come out easily. If not, give it another minute or so on the iron.

Step 4

God bless the label-maker.

Step 5: Be careful not to burn yourself, the metal is hot when it first comes out of the packaging. After a brief cool-down, clean the old adhesive off of back of the pan (when it's still a little warm is the easiest!) with your rubbing alcohol. You are now ready to apply your magnet.

Step 5

Don't Burn, baby, burn: (let the metal cool for a sec before touching it!)

I found these pre-cut adhesive magnets in the craft section at Hobby Lobby:

Step 6: Almost there! Put that little magnet on the back of your pan. By the way, check to see if your empty palette is just plain metal, or if it's already magnetized... you could possibly skip this step!

Step 6

WAIT for it.......!!!

Step 7: Seems a little overkill-ish, but you'll be happy when you run out of that color and want to get more!! Apply your label onto the back of the magnet. There should be enough left-over adhesive on there to stick it right on.

Step 7

Awwwww, Label and Magnet: a match made in heaven.

Woooo-hoooo! Now you can pop those pans into your palette and hit the road! Want to know how to make your palette look like mine? Check out my post on cracking your palette here!

Step 7

Pop those pans into your palette and hit the road!
By the way: I learned this trick via you-tube vids. Petrilude's vid is BY FAR my favorite one out there! Click on his name above for the link to his video^ if you'd like to watch this in action!

Is the MAN keeping you down?? Customize your x15 MAC Pro Palette

Don't let someone tell you how to organize your shadows... You are the ARTIIIIST, after all! BEFORE: BORING and limited shadow storage ZZZZZZZzzzzzzzzzzzz.....To fit more fabulous shadows onto my Pro x15 palette, I wedged a small flat head screwdriver through one of the empty shadow spaces, and underneath the top plastic piece. I pried it up just enough so I could grip it with my hand...

Be careful here, if you give it too much muscle, it will snap and could fly across the room- possibly injuring an innocent bystander (or you!). Slowly pull one end up, and if you get it just right, that piece will pull right off.

Waaaah-LAH!This can work for many brands of palettes, existing Mac Pro x15's, and mac palettes that are smaller as well... so play around and see. Mac is making a new 'blank-canvas' large palette that you can customize now, I purchased this newer generation palette with an optional plastic liner for lips. Sounds like we won't be breaking the inserts out of mac pro palettes for long! Good work, MAC.

Thinking outside the box, errr, palette: you can get nuts with products, too: invite your foundation powder to the party, blushes, bronzers, cream blushes, whatever!

Getting crazy here, peopleGet creative, and let me know how it goes. Until next time, Stay Fabulous my Friends!

Having a Love Affair with Make-up Wipes?

Do you love makeup remover wipes, but hate that they have a tendency to dry out? Oh makeup wipes... I love you, too. but...

Here's a quick tip:

Store your wipes upside down. The cleanser fluid will remain dispersed throughout the top wipes, which are the most exposed to air when the package is opened. I think you'll find that your wipes will last much longer!

BOOM: thats it! (I did say "quick", right??)

Enjoy, and until next time- stay fabulous my friends!

Beauty on the Brain: What's on my countertop right now

Happy Labor Day Weekend! If you're anything like me, you use a holiday weekend (BONUS DAY!) to have some fun AND get a little bit ahead of the game. I had a chance to get organized and thought I would share what's on my Review To-Do list, and what I'm playing around with now!

Getting Glam

MAC Cosmetics Pressed Pigments (new collection 2013) in Blonde Streak and Black Grape: picked these babies up at the MAC pro store on Armitage in Chicago last week. Loving these so far! If you try them, be sure to do your foundation AFTER your eyes (despite being easier to use than MAC Pigments, there can still be plenty of fallout)

Not all glosses are created equal

e.l.f HD Blushes and e.l.f Super Glossy Lip ShinesI picked up a bevy of these inexpensive OTC products in lots of colors to mess around with, and it seems that there is a pretty big difference in consistency based on which colors I am using- crazy! For example, the "Honey Do" gloss is sticky and unenjoyable... but "Goddess" is a dream to wear. This should be interesting...

But oh yeah: they were only $1. So as long as they aren't like, tar or poison or something, it will be worth it to find a keeper! =)

Snake Oil? No, Snail Serum!

Biopelle Tensage Products: Have you heard? Snail Secretions is being used as an anti-aging element. At this point, I'm only scratching the surface with my research... but here's what I know so far: Companies are using snail secretions in facial products for anti-aging. It sounds a little weird so far, but the theory is that (pre-historic?) snails have evolved over time to protect themselves from environmental damage/ repair injuries, and are secreting growth factors and glycoproteins that are great for our skin. I need to do my homework and check out some clinical data, but in the meantime, I'm hearing good things!

Biopelle Tensage SCA 8 Biorepair Index is a particular brand of snail serum product that I'm experimenting with. SCA stands for Secretion of Cryptomphalus Aspersa, which I understand to be the type of snail. Biopelle Tensage Eye Contour Cream is their super popular slightly-tinted eye product, and I am LOVING it so far. Absolutely LOVING it. I'll be sure to review this as I learn more!

Slow and Steady wins the race! Wait: maybe that only applies to tortoises... Have a safe holiday and until next time: Stay Fabulous my friends!

Drug-Store Shout Out: e.l.f Studio Mineral Infused Face Primer

A decent makeup primer can be YOURS for the low, low price of $6!!!I was intrigued by e.l.f. when some makeup artist acquaintances rolled down a list of their secret e.l.f. favorites, so I thought I'd start exploring by demo'ing some basics. I chose this $6 Primer in Clear to start, which was 30% off when I ordered it- wow. I must say: I was pleasantly surprised by this particular elf item. It has a very similar silky/satin-like consistency as some of my favorite primers, including GloMinerals Face Primer ($26) and Smashbox Photo-Finish ($36). This product also has a similar ingredient deck, though there are a couple of silica ingredients that some of the others lack. Interestingly, this product is gluten-free, while my favorites are not. It doesn't stay perfect for quite as long as some others, and lacks some of the anti-oxidants (like Vitamin E) that others have, but for $6- I didn't feel disappointed, necessarily.

So, if you're in the mood for a good gamble with not much at risk (besides maybe hour 12 of foundation perfection!) it might be a good one the next time you find yourself in need of primer.

Product Review: Latisse

Word on the Street/Company Claims: Longer, thicker, and darker eyelashes can be yours when you apply this bimatoprost opthamolic solution .03% every night to the lash line (like liquid eyeliner).

They are actually not sure why it works- funny, right? In summary, this product was first available as a glaucoma treatment (Lumigan… but was/is used IN the eye as a medication). Basically, a whole lotta glaucoma patients ended up with a whole lotta fabulous lashes! And so after an FDA trial and a repackage (kinda): Latisse was born.

Appropriate for who?:

People who feel like their lashes could be better… and unless you are one of those people gifted with epic lashes: who doesn’t?

NOT so good for:

Those already undergoing treatment for glaucoma, and those who may be having an upcoming opthamalic surgery or procedure,… ask your doctor.

Totally Fabuliz: (Favorite part):

It ACTUALLY works. If you like to put 2, maybe 3 coats of mascara on, you will fall in love with Latisse (and may even find yourself joining the rest of the 1-coat world!) Measurable change takes place over the course of about 16-18 weeks as your untreated lashes fall out naturally and the Latisse’d lashes cycle in.

Just OK:

I would guesstimate that I’ve seen maybe 2 of every 50 patients experience some eye irritation with this product. So while not often, that can happen. Also, there’s a chance of a pink-ness that can develop on your lids. It happened to me, and will go away as soon as I stop using it. Doesn’t bother me enough to discontinue use AT ALL… You can’t stop me now!! MUAHHahahahah (crazy laugh) … ahem… sorry.

The Lid-darkening on me: which doesn't phase me at all. Um have you SEEN my lashes? =)Needs work:

The disposable applicators are not as user friendly as a tube/wand package would be. (kind of like Revitalash). However,  since Latisse had to get FDA approval… they went over–the-top with safety so they could get approved, fast. The instructions say that one brush is to be used on one eye, disposed of, and then another brush used for the other eye. TWO applicators EACH DAY? I’m thinking: We apply mascara to both eyes every day with only one wand! I understand that its indeed a bit different here because there’s no preservative… but listen: You can almost hear the landfills crying.

Star Rating: 4 STARS!!!★★★★

★1 Star: Might pass this one up

★★2 Stars: Okay for the money

★★★3 Stars: Really nice product, I’d buy it

★★★★4 Stars: Pretty much deserves a Nobel Peace Prize, want it/need it/ have to have it!

Misc Notes/Other need-to-know's:

Don’t stop using it. Once you have your results you need to keep going! I don’t have a problem with the thought of maintaining though- once you have your fabulous lashes you want to keep them!!

More= Not always better! Don't waste your precious Latisse!!Check out my other blog post with additional Latisse info here, including a video of how I like to use my Latisse, (but always follow the instructions of your doctor!)

Click here for Allergan’s official Latisse Page. And PS- Definitely join their Brilliant Distinctions reward program so you can earn points for your purchases… you can get coupons for $25 off, $50 off, and even more if you spend enough or have treatments like BOTOX  Cosmetic.

Bottom Line:

I'm a Latisse-r for Life. Love. Love. Love.

Before and After: Temptu s/b Airbrush Makeup

So here is a cute before and after of some airbrushing I did this weekend for a wedding. This is using TEMPTU Silicone-Based Makeup and a small, relatively inexpensive compressor.  My fabulous makeup artist friend Jennifer Johnson schooled me on basics a while back, and suggested TEMPTU to start my airbrush kit. I've been playing around with it for a while and I think I'm in love!

This cutie-pahtootie didn't need too much help... Gorgeous, Dahling!!!After Airbrush 2

As you can see, she has beautiful skin and gorgeous features anyway, so she could make any makeup artist look good… but I LOVE the dewy (yet not greasy or shiny) consistency of the s/b makeup, and it wears like a champ!

Fabulous Lashes without Batting an Eye?

I’ve been getting a lot of questions about Latisse lately, so I thought I’d throw something together with my personal tips and some official information, too! 1)   Latisse rocks, but it’s $$$: Here’s a video of how I like to store and use my disposable brushes so you can get more use out of each package. This is considered off-label, meaning it’s not necessarily the way the product is labeled for use- so always do what your doctor or skincare professional recommends!

Click on the image to see the you-tube vid!2)   Let’s not get Crazy: I’ve heard of patients using a makeup brush to apply the product… I would NOT recommend this, as Latisse does not have a preservative in it. Hygiene is of course very important, especially with the eye-area, so stick with the disposables for sure.

3)   Night Owl: Only use Latisse at night, with your contacts out and makeup off. Contacts can actually absorb the product, so be sure not to cut corners here. Apply your eye products and treatment creams first, and Latisse will be the very last step.

4)   Browing out: An off-label use of Latisse is applying it to the eyebrows. I did that once for a period of time to experiment, and found that it would not grow hair where there wasn’t hair already, but that it did make individual brow hairs a bit darker and longer, too, contributing to a bit of a fuller effect.

5)   Changing Eye Color?!?: I think when patients hear this, they freak out and think their blue eyes could turn brown and vice versa- thankfully this is not the case.  To summarize, when Allergan did a 5000 patient study of the Lumigan version of this product (used IN the eye) for the treatment of glaucoma, there was a small percentage of people with hazel eyes that had darkening of the gold-flecks in their eye. This change was found to be lasting. If you have hazel eyes, consider if that would bother you, as it could be a risk… important to consider that it was only happening to a small % of the people using the solution IN the eye, like an eye-drop, which we are NOT doing with Latisse. Other eye colors have not been found to change or darken.

6)   No biggie?: There is a chance that you can get darkening of the lash line where you apply the Latisse, since it’s increasing melanin (and making your lashes darker!) it happened to me, but the trade-off for awesome lashes is just fine with me. It’s kind of a light pink, so it covers easily with a light shadow/I don’t even really notice it. Some of our patients who already have dark eye areas think twice about using Latisse. Thankfully, when you stop using it, it goes away… so no biggie if you ask me.

7)   Keep the Faith:  Latisse can take up to 16 weeks for full results… this is because when you first start using it, its treating the lashes that haven’t grown in yet. So, it can be hard to use a product every night when you don’t see much happening, but Latisse WORKS, so keep up the good work, and hang in there for fabulous lashes!

Here’s a link to Allergan’s Latisse page, please read up for full Rx info and more official business!

Practice Safe Sun: Faux Tanning

I just got home from the fabulous Cosmos Beauty Bar, the home of  -you guessed it- Cosmopolitans (and wine, and coffee, and martinis!) AND simultaneous high-quality beauty treatments by amazing professionals. This cutie pie place is located conveniently in my neighborhood in the suburbs of Chicago, and offers spray tans, waxing, and all kinds of fabulous nail services. Although I did not happen to imbibe today, I did indulge in a pedi and a spray tan… which got me thinking about spray tans, how they work, and why they rock. Don't look TOO close... but these runner's feet have been polished to the maximum extent of cute at Cosmos.

It seems that the first 'fake tan' was available around 1960, when Coppertone® came out with the first sunless-tanning product -- QT® or Quick Tanning Lotion. I understand that this was an orange-nightmare of sorts. Yikes.

Anyway, things have come a long way since then, and there are all kinds of formulations and application methods to suit your fancy. The ones that I have the most experience with are DHA self-tanners. DHA is actually a type of sugar. Who knew?

According to the FDA’s website: “One commonly used ingredient in these products is dihydroxyacetone (DHA), a color additive that darkens the skin by reacting with amino acids in the skin's surface”

If you are having a spray tan, or spraying yourself (with a tan in a can), a fine mist of product containing DHA (Dihydroxyacetone) blankets the skin lightly. Lotion products also contain DHA. It turns out that DHA does not produce the same melanin as a "real tan" (by stimulating melanin levels), but it does create the look of a tan appearance by turning the upper layers of the skin brown. DHA activity only takes place in the upper layer of the skin (epidermis) as amino acid proteins and epidermis skin cells mingle and party.

Dihydroxyacetone parties with epidermal skin cells: "Epi-DAMN, girl! Let's Mingle!" (yes, I drew this!)

Typically, color develops somewhere between 2 - 24 hours from the application and the intensity is depends on how much DHA in the product. More DHA=More Brown.

If you’re having an “airbrush” tan, or a spray tan applied by an individual, it usually means that you’ll be in your undies in front of a stranger… but really, there’s nothing they haven’t seen… so try not to worry about it. It’s less than 10 minutes, and the result is AWESOME, custom, and usually really dang perfect.

If you go to an LA Tan, or similar tanning boutique, they will also offer a spray tan or UV-Free tan via a booth. This is more private, usually a bit cheaper, but not as flawless as the airbrush. Oh, and it feels fumy! I try to hold my breath as much as I can, but I’m sure the poor employee on staff does not want to find me passed out in there... so I do feel like I end up breathing some of it in- just a bit worrisome for me, but it’s still GOTTA be safer than UV tanning, so I’m still doing it. Take that, tanning beds!

If you’re a DIY-type, here are a few of my favorite at home self-tan products:

Playboy (yes, they have tanners!) Glitz Celebrity Sunless Spray …AMAZING. Love the lotion too, but you might want to try applying it with one of those disposable sponge brushes that painters use for corners… it’s pretty dark (scary) when it comes out of the bottle…

Victoria’s Secret Beach Sexy Instant Bronzing Shimmer Lotion

Fake Bake Airbrush Self Tanning Spray

Jergens Natural Glow+ Firming (I generally don’t bother with the fair to medium levels… go for the gold! Err, GOLDEN with medium/tan!) This is also awesome for maintaining a spray tan! Caution, this one has a bit more scent than the others in the line.

For Face: Clarins Face Self Tanning Mouse SPF 15… extra points for SPF, Clarins!

The take-away from today: It may take some trial and error (though we are much better off these days than in 1960!) but it's important to find a bronzer, a spray tan, or a self-tanner that works for you.

...because always remember, kids: we all need to practice SAFE SUN...  your skin will thank you!

You've got 700 hairsprays... continued

Last week, with the house up for sale, I began to address a question that plagues many product junkies: How will I ever hide/display all my products, makeup, and endless beauty paraphernalia so it doesn't look as though a mad scientist lives here? Here are a few more ideas that make my product obsession live-able, some in the big-bucks range, some in the budget-friendly department:

Elfa Closets:

Thanks for ruining me on 'normal' closets FOREVER, Elfa!Elfa Closets from the Container Store made the bigger closets in the house look clean and organized. Are you familiar? These customized organizers are TOTAL game-changers. The high quality drawers and shelving make you WANT to arrange everything neatly …and then stand back to admire your work like, “Dang, I’m good.” (by the way, check out my re-purposed Nordstrom boxes to hide yes, -products- and less display-worthy clothing items. Reduce, Reuse, Recycle, people!)

Anyway, with the closets I chose ranging from $500-$800-ish per closet, I had to forgo installing everywhere... So I had to get creative with product storage in the linen closets:

Maser Bathroom Linen Closet at the Product Pro's placeHere is my master bath linen closet. Products that are higher up are reachable with lazy-susans from the kitchen section at Bed Bath and Beyond. I have a 2-tiered LS on the top shelf, and also a small one under the sink.:

IMG_5450

IMG_5451

Also notice the cute white BISLEY drawers at the bottom.

IMG_5453

http://www.containerstore.com/shop?productId=10000342&N=&Ntt=bisley

This is my new favorite organizer. The drawers open and close smoothly and products don’t roll around inside. I bought 3 of these originally, one in file cabinet size, this one, and a small one- originally meant for the office. Remember- its all about thinking outside the box! Can’t figure out how to store something in your bathroom or office? Check the kitchen section, and vice versa.

These organizer drawers are just a little too little...Here are some small organizer drawers from the container store in the garage section. Really though, these tiny drawers are cramping my style a bit... just a touch small for as many products as I'm trying to store- but maybe good if you sew, or I dunno... collect buttons or something???

Good luck to your VISA, by the way, if you get excited about Elfa or Bisley. These solutions are not the cheapest options, but you can make it up by spending less somewhere else, like here:

Holla! (these are from the dollar store)This is a shot from my hallway linen closet. These baskets are from the dollar store! Yes, the dollar store! Ok, not loving the color as much, but the varying sizes and super cheap price-point make me like them a little more... I guess they can't ALL be Elfa. (yet!)

So keep your eyes open in unlikely departments and happy shopping:  Product Organization can be had with an $800 closet or an $8 closet!

Product Storage: You've got 700 Hairsprays. Now What?

This last week has been a whirlwind. Not only did we list our house for sale, but we had 3 showings AND an open house within 30 hours of listing. As a product junkie, its an understatement to say that a few things had to be tidied up. But I wondered: How will I ever hide/display all of my endless beauty paraphernalia so people don’t walk out of the house wondering if a mad scientist lives here?

In my next few entries, I’ll share some cheap, cute, and/or creative solutions I came up with to make being a product junkie live-able AND conducive to selling a home:

To start, here is my home spa room on the lower level of the house, home to a zillion skin care products:Image

Baskets? Sure, they're cute... but not so creative OR cheap (typically). I needed lots of them in this case, and these little guys came CHEAP in packs of 4 or 5 from Ikea. If I did it again though, I might go with THESE which my mom loves for her office storage. I love how clean they look and IKEA has the best prices for the quality (2-packs in varying sizes for $6.99).

The silver metal case on the shelf is really the AWESOME find in this post. It's from a store called Harbor Freight Tools. Baskets from Ikea, and one of the Aluminum cases I got at Harbor Freight

Baskets from Ikea, and one of the Aluminum cases I got at Harbor Freight

Those who know me may think it’s weird for me to be randomly shopping in this dollar-store-version of a Home Depot, but I resent spending big bucks on utilitarian items. I look at it this way: the more I save here, the more I can spend on skincare and handbags. Right??

Anyway, this aluminum case is perfect to store and travel with makeup, paint/paintbrushes, skincare, and tools too -if you’re into that kind of thing!-  and comes with adjustable dividers and a shoulder strap. Style-wise, it could be a cousin of my expensive Sephora Brand Aluminum makeup kit. It doesn’t feel as high quality as others, but you just can’t beat the price- I actually bought 4! Harbor Freight also offers ‘20% off one item’ coupons, so if you’re stocking up, sign up for their mailing list.

This brings up a good point (if I do say so myself): when you’re looking for a solution, try to think outside the box, or at least try not to default to the most convenient solution.

Here's what I mean: in a casual google search just now, a metal 36" ruler at Dick Blick is $11.25. Then there's our friend Ace, who carries one for $4.49.Image

Of course, sometimes you get what you pay for, and there are always exceptions.

Many times, makeup and skin care supply/storage can often be found where you're not looking for it: in the kitchen section of a store or maybe the Dollar Spot at Target. You could even re-purpose that collection of fabulous boxes you accumulated when you were on that Louis Vuitton kick (oh, maybe that was just me) but you get the idea...IMG_1174

So the next time you're looking for a storage solution or a new supply, look around and see what you can re-purpose, and keep your eyes open for the less-likely solution. Getting creative may just make your life easier without spending all of your shopping money!