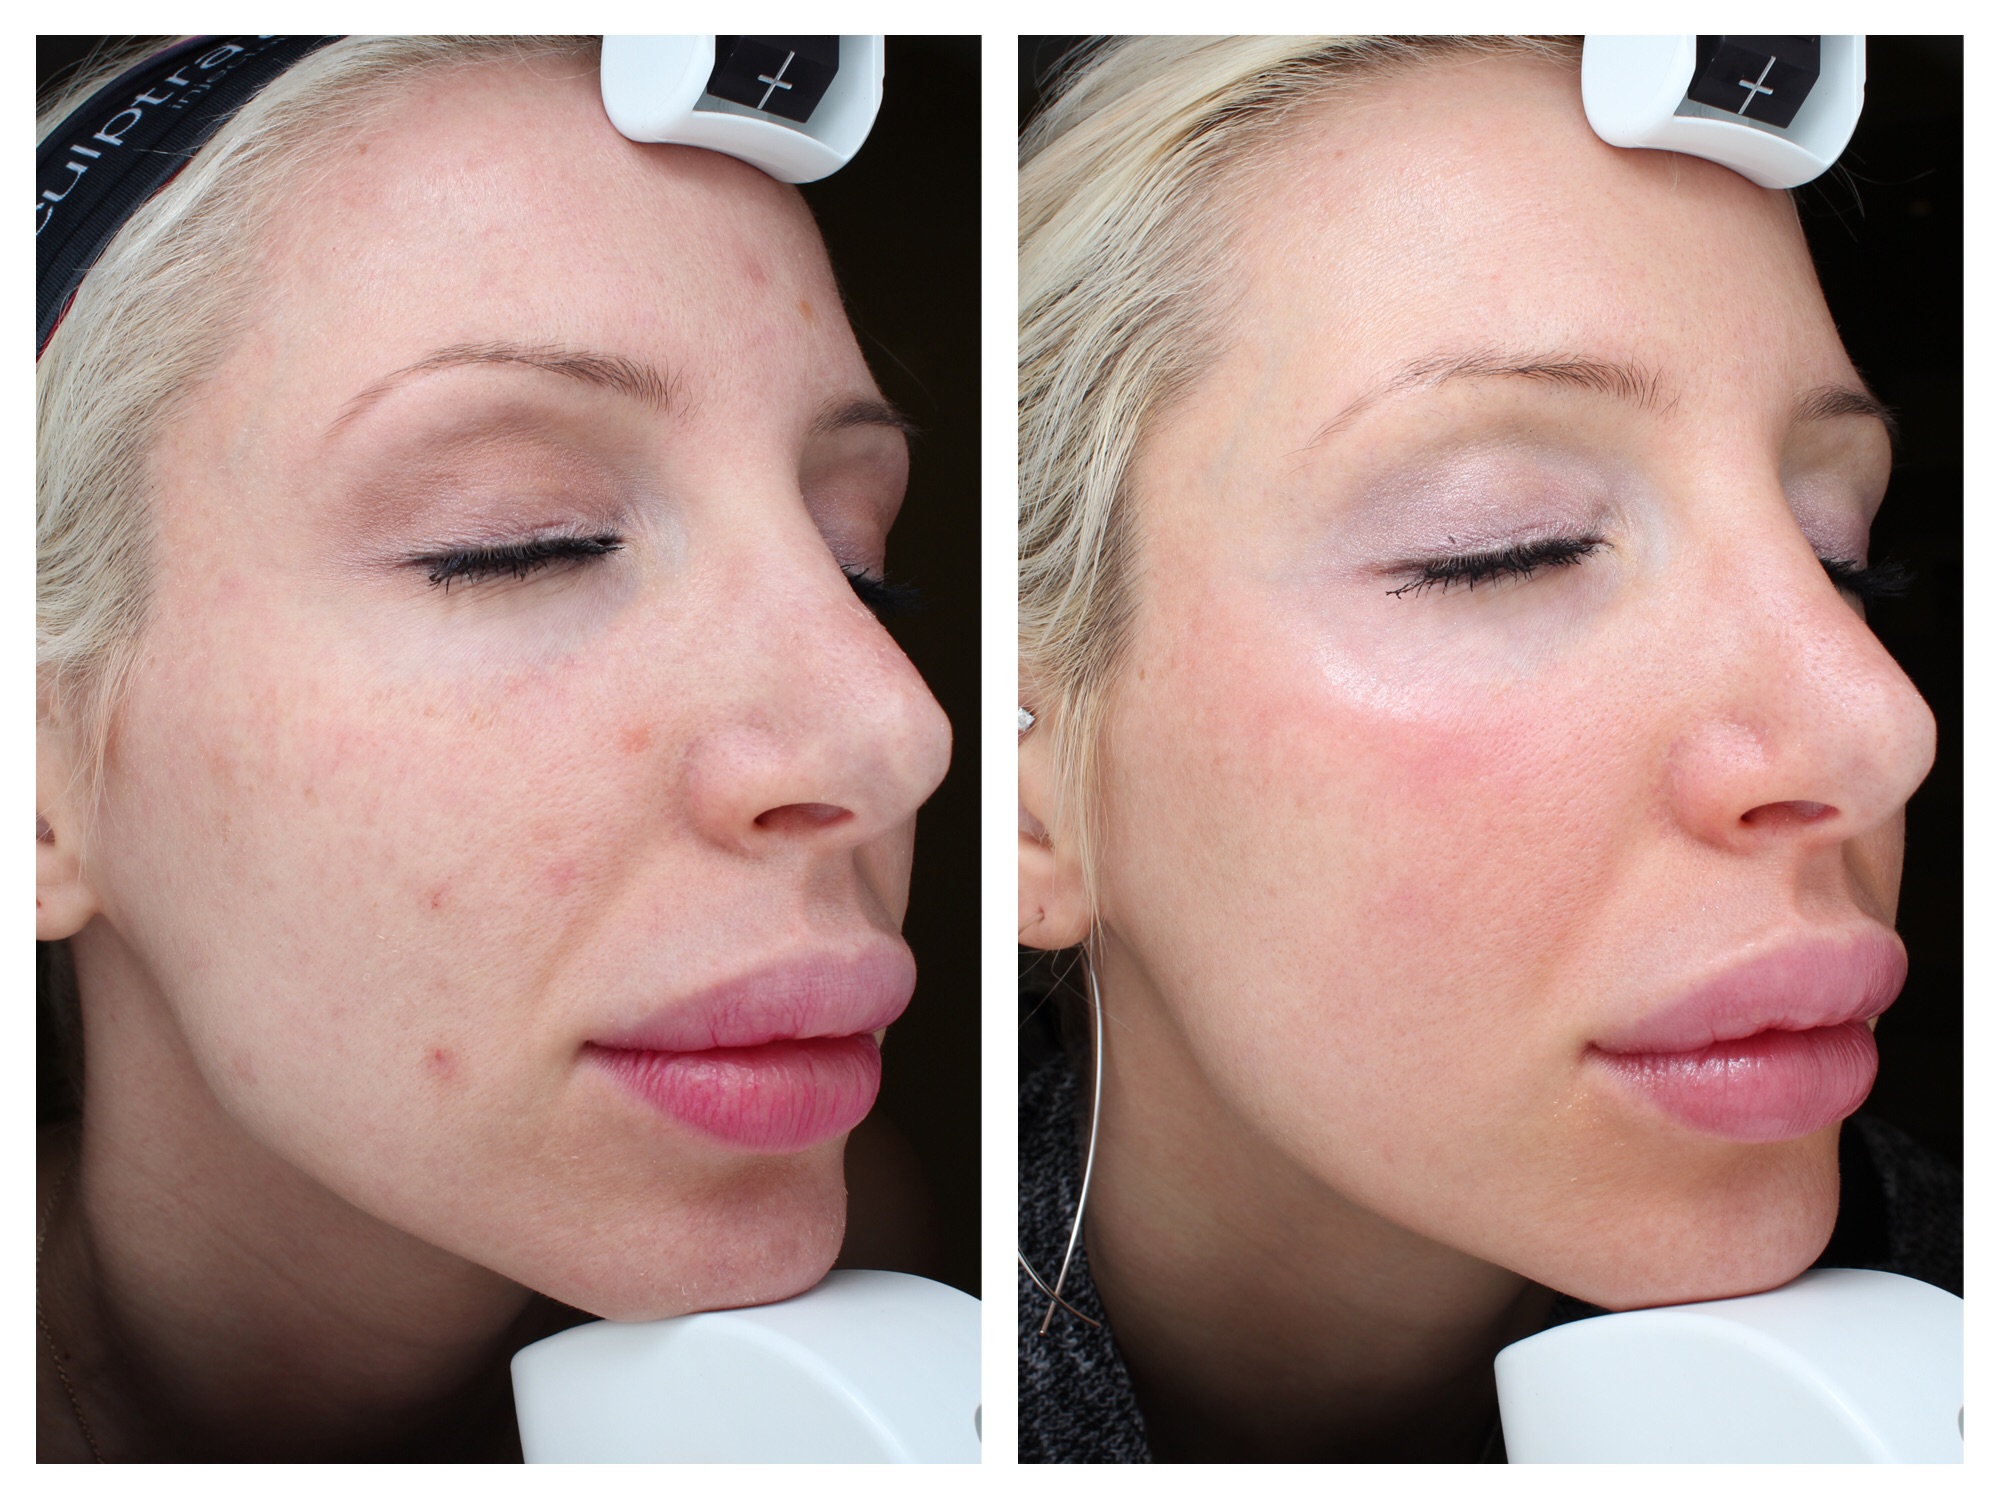
While it's a little embarrassing to reveal what my complexion looked like before, the results are TOO GOOD to not to share. Here are the before-and-after Visia Imager photos from my Halo Resurfacing. (no foundation/concealer, moisturizer, or anything on the skin in either pic). I've been meaning to share these for a while, I am SO happy with my results! What is Halo? Halo laser is the first of it's kind: a hybrid (ablative and non-ablative) fractionated laser. Translation: 2 different wavelengths of laser fire off at the exact same time. Down-time is a fraction of any other fractionated laser out there- (you can wear makeup out the door) - and the results are exponentially better from my perspective. It's almost like having double the treatment with amazingly little social downtime, if any.
If you are on the fence about this procedure, I would urge you to go for it.
 My Results: a reduction of pore size, almost no breakouts anymore, reduction in discoloration and hyperpigmentation, a tightening of the skin, improvement in texture and a noticeable glow or luminosity... probably why they called it Halo.
 My Plan: Moving forward, I plan to get a Halo once a year to maintain- now that my skin is so improved, I'm spoiled!
Check out Halo at Erickson Dermatology here
and click here to see more Halo Before and After's
Until Next time, stay fabulous, my friends!


